Getting your sketch just right on your canvas before starting a painting can be a tricky thing to do. For the most part, planning the composition on something that isn’t the final surface is always a good idea. This can be quite time consuming and laborious and in a fast paced, meme driven world, so who has time for that? Working out all your mistakes before moving onto the final painting is something that takes a little time, but I promise you, it is well worth your while. No one wants to get midway through a painting, only to realise everything needs to be moved over 3cm to the left. So, if you want to save a bunch of time and have a more accurate and precise recreation of your subject matter, you may want to consider using a transfer method for sketching up an image on your canvas so you can get painting sooner, rather than later.
Image transfer is a method where-by you are moving an image from one place to another, i.e., getting a sketch from a piece of paper, computer screen or some other physical object onto your painting surface. There are several methods available. Each method will get you much the same result, but they all have their advantages at different times, depending on your situation. Honestly, it’s not rocket science, but it is helpful. Some say transfer methods are cheating, but I say, get off my back bro, I’ll use whatever tools I have available to me to get whatever result I desire. Anyway, let’s not overthink it. Here we go:
Overview
- Transfer paper
- DIY Transfer paper
- Projection
- Apps
- Grid Transfer
- Doodle Grid/Squiggle Grid Transfer
- *Old Fashioned Methods
Transfer Paper
Transfer paper is basically just a sheet of paper which has been coated in carbon on one side. By placing this sheet on a surface carbon side down and applying pressure on the other side with a drawing implement like a pen or pencil, you will transfer the carbon onto your surface through the pressure of the implement. Most people put their reference image over the top with the transfer paper sandwiched in between so when they trace the image it transfers the carbon to the surface underneath. Transfer paper is available in sheets of paper and in rolls.
Pros
- Its quick and easy to use.
- One sheet can be used multiple times.
- Compared to DIY transfer paper, it’s a lot less messy and is considerably more convenient.
Cons
- It can be expensive.
- It is limited in terms of size you can work at, or at least its far more commonly used for smaller works and is mostly sold in A4 sheets.
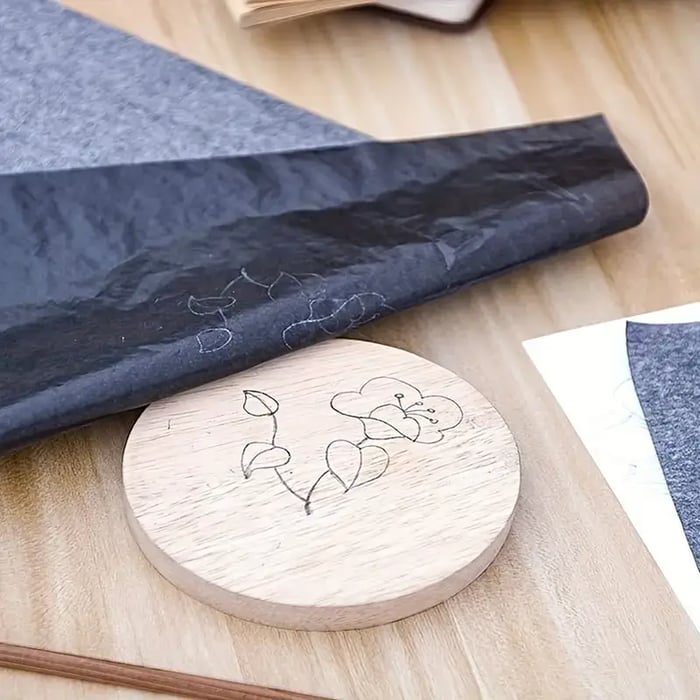
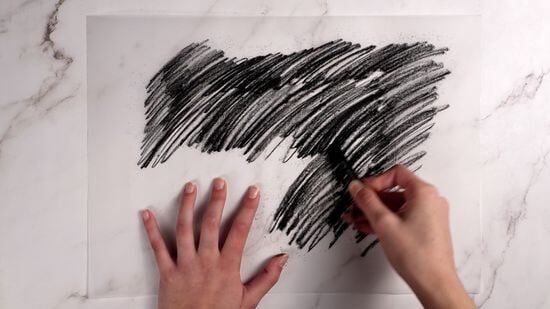
DIY Transfer Paper
A cheap alternative and the tried-and-true method from artists of all ages is to make your own transfer paper. It is simple, first all you need to do is apply a layer of charcoal (or similar) to the back of the image you are wishing to transfer. Then press the charcoal side down to your surface and trace your image on the other side with a drawing implement. This method will give you much the same result as store-bought transfer paper.
Pros
- Despite the small amount of charcoal or graphite you may use, its costs almost nothing to do.
- It’s convenient in different ways to the store-bought transfer paper, as you can really work at whatever size you like. Within reason, of course.
- It can easily be adapted to any medium. Your even able to use oil paint instead of a charcoal or graphite allowing for a more permanent transfer.
Cons
- It requires more preparation for you.
- a little less accurate
- a little messier.
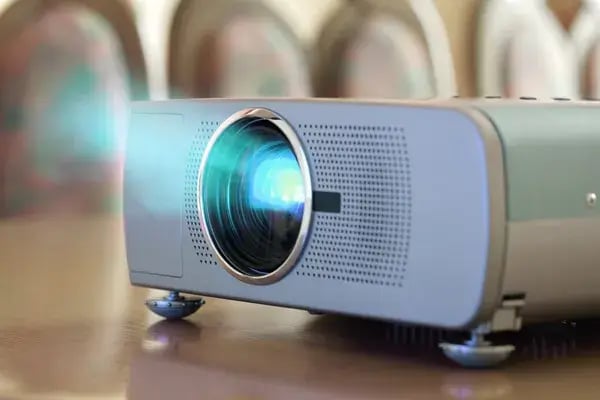
Projection
Projection is arguably the best way transferring a large image onto your canvas, but it is the most expensive. Well, it requires the large outlay. If you were planning to use it long term, then over time it is cheaper than having to buy transfer paper purely because a projector is a singular purchase. Once you have a projector, you can use it indefinitely without incurring any further cost. I mean, beside the electricity it costs to run it, I guess. With a projector, like the name suggests, you can project your image straight onto the canvas and then trace over the projection to get your image on the canvas. If you have a digital projector this would mean you would have the image on your computer or similar device to then process through the projector. If you find yourself with an over-head projector, you will need you print your image onto a sheet of acetate.
Pros
- You can easily resize and edit your reference image to suit your needs.
- It is very simple to trace the projected lines.
- Suitable for works of all sizes.
Cons
- You sometimes must draw in awkward or uncomfortable positions to avoid blocking the light of the projector.
- Can be quite costly, a decent digital projector will cost you at least a few hundred dollars.
- Depending on the quality of the projector, your projected image may be pixelated and harder to trace accurately when enlarged.
- Not suitable for large scale mural work. Well, not stuff on a multiple story building.
- Not suitable for use outside on a brightly lit day. It really needs to be used in a darkened room to see the projected image properly.
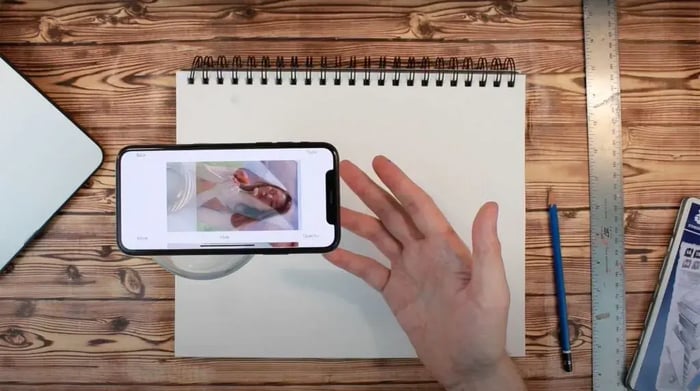
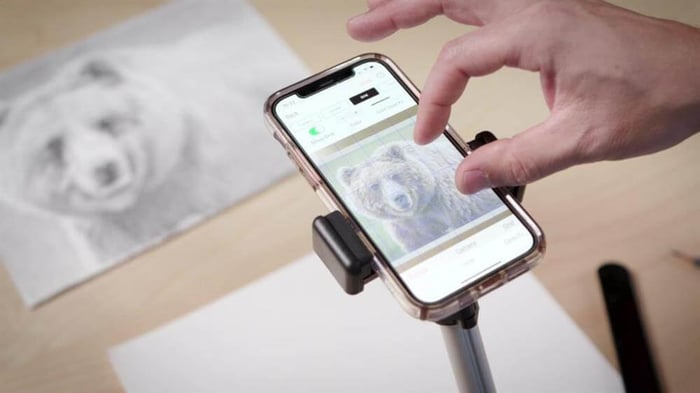
Apps
Another exceedingly handy method which utilises technology is an app which allows you to see your image through the camera on your phone. Although its more useful for smaller works, this method simply adds a transparent version of your image over the image presented by the camera allowing you to see both images at once on your phone, or tablets screen. This one can be a little tricky to master as you need to draw on your canvas while keeping your eyes on the screen and this can feel a little weird at first. Once you get the hang of it, it’s a quick and easy method for transferring your image. One that I have used in the past in called “Davinci Eye” but I’m sure there are plenty of options, so pick one that is available on your device. Another thing that I feel is worth mentioning, is the fact that due the nature of the app, you really need to keep your phone quite still while using it, so a tripod is a must.
Pros
- Convenient
- Inexpensive
Cons
- If you get a phone call mid-transfer, it can be really annoying to re-align.
- Requires that you have a smart phone.
- It can be disorienting drawing on your canvas while looking at your hand through the phone - getting used to this takes a bit of practice.
Grid Transfer
Grid transfer is a method which has been in use for many years and probably constitutes one of the cheapest methods in the list. It’s great when you need to upscale an image from a smaller piece of paper onto a larger surface, and when I say larger surface, this could realistically be applied to any size, from a canvas to a giant side of a building. It does require a significant amount of work but it’s in its own league when it comes to adaptability. Basically, you need to just draw a grid on your image and then replicate this grid on the surface of your painting or drawing surface. This allows you to follow the grid to replicate the image onto the surface by following the dissecting lines and giving you a series of reference points to work from. This method does require an amount of work not present in a lot of the other methods.
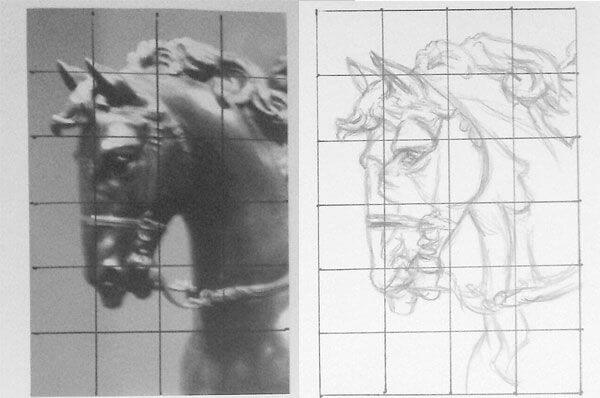
Pros
- Very simple process.
- No expensive equipment required, as you just need a pencil and a ruler.
- Can be applied to a variety of size canvas.
- Can either upscale or downscale your reference image.
- Allows you to still utilise your drawing skills, rather than merely tracing.
Cons
- May take a bit of time to master.
- It is imperative that you make sure the aspect ratio and proportions of both your reference image and surface are the same for the grid to work.
- Can be quite a long process compared to other methods.
Doodle Grid/Squiggle Grid Transfer
This method is often used by street artists to transfer an image onto large walls. It is mostly the same principle as a standard grid transfer but a little less formal. For large scale mural work it’s certainly much easier than the grid because that method relies heavily on the precision of straight grid lines whereas all bets and off with the doodle grid. They begin by applying a series of wiggly lines along all the wall, there is absolutely no need to be precise here in the application of the squiggles, as you are only creating a random pattern of reference points for the next part of the process. When you are done making the person who commissioned the mural sweat, thinking that they’ve made a massive mistake because at this point it just looks like you’ve trashed their wall, you need to photograph the wiggly masterpiece. 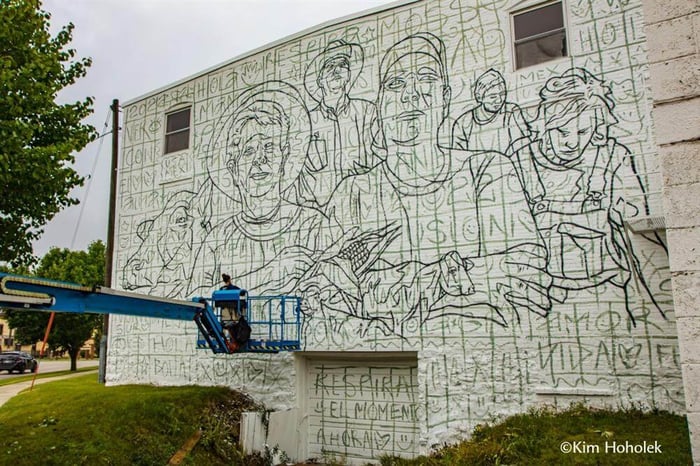
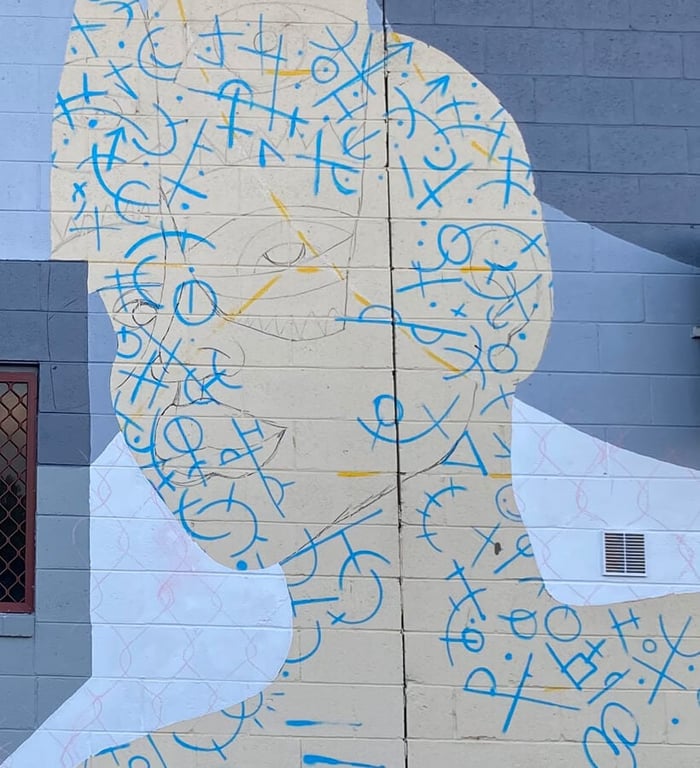
In a photo editing program, alter the transparency and layer this image it over the top of the reference/design you are looking to transfer. Make sure to line up your image exactly how you want it to appear on the wall. This image will be your road map for drawing your design onto the wall. It pays to have used a lighter colour paint for the wiggly lines, so you can still see the sketch outline clearly when you are transferring. From here, use the photoshopped reference image and draw this up on the wall, taking note of what parts of your design intersect with which wiggly line as your map.
Pros
- Really the best and easiest way to transfer a reference image onto a surface of massive scale.
- Straight-forward process.
- Doesn’t require expensive materials.
Cons
- Not quite as versatile as the other methods.
- Does require some skill in photo editing software.
*Old Fashioned Methods
I’ve included this one, just as a fun little tidbit, although I doubt it’ll be any easier or more useful than any of the previous methods I’ve already mentioned. However, I feel it’s important or at the very least interesting to note the different methods that have been used through-out history. Much to their dismay, artists of old, didn’t have access to photographs, or projectors - not even overhead projectors. But trust me, if they were available, they would have used them. What they did have was the camera obscura. And don’t be confused by the name, this by no means resembles the camera of today. In fact, I feel like calling it a camera is exceedingly generous. At any rate, the camera obscura is a simple device. In essence, it is a darkened room with a pinhole in one wall. Through that hole, light can pass, casting a projection of whatever is on the opposite wall outside. The image will appear upside down inside the room and can be traced much like the projector of modern times. The camera obscura was just one of many methods used by the old masters, but most of them used a similar mechanism, or was enhanced by utilising mirrors and lens.
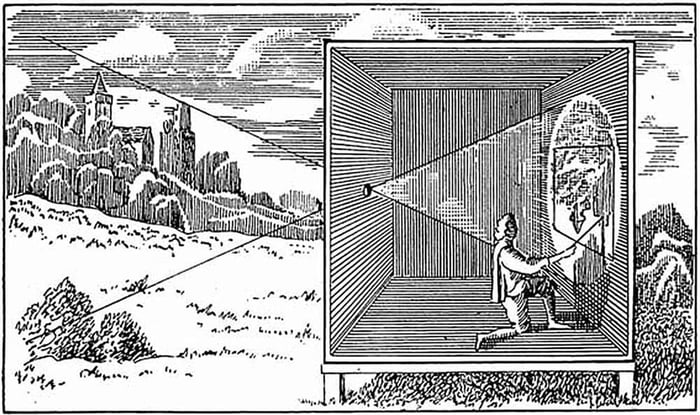
Artists during this time would not have considered using these processes as cheating, but rather so a useful tool that could attain greater accuracy and precision quicker. Although outdated, the principle of these tools remains the same – artists everywhere are still seeking simple and efficient methods for transferring a reference image to a surface.
So, there you go, now you are aware of all the different methods, go ahead and transfer until your little heart is content! You may use whichever method that seems the most suitable for you and your specific project. There are pros and cons to each method so it’s up to you to decide which will work best. As for whether transferring is cheating, well that’s also up to you to decide. There is an element of robbing yourself of the opportunity the improve your drawing skills, but honestly, it’s like saying that driving is “cheating” and you’re robbing yourself of the opportunity to get better at walking. At the end of the day, the finished product speaks for itself. It is like the debate around working from a photograph versus working from life, which I won’t get into, but I think I’ve made my point. Use the tools that work for you and will make the result that you desire. Don’t deprive yourself of using methods or materials just because you are worried about judgement from others. Do what helps you make the best art that you can and take all the help you can get.
Your one-stop shop for art supplies
And there you have it, 7 transfer methods for all artists! At Art to Art, we have a wide selection of art supplies to choose from, including oil paints, varnish brushes, colour pencil sets and so much more! Upgrade your collection today and experience the quality! Same day, Dispatch Australia-wide. Before you go, don’t forget to check out our collection of markers, paint pens and drawing accessories.